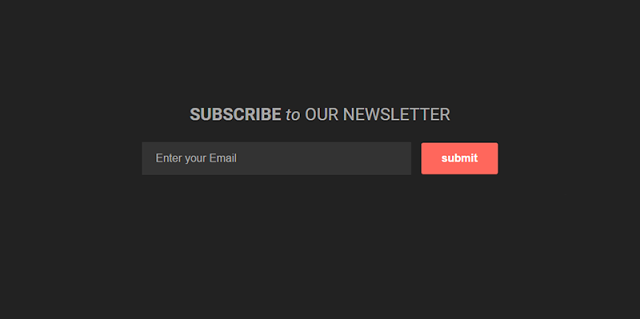
How to Create Subscription Box |Blogger Tips 2016

How to Create Subscription Box
1. Go to Blogger> Template> Edit HTML
2. Place the code below the above code]]> </ b: skin> or </ style>
/ * Subscribe Box * /# Subscribe-css {position: relative; padding: 20px 0; background: # 222; overflow: hidden; border-top: 4px solid # eee;}.subscribe-wrapper{color:#fff;font-size:16px;line-height:normal;margin:0;text-align:center;text-transform:none;font-weight:400;width:100%}.subscribe-form {clear: both; display: block; overflow: hidden}form.subscribe-form {clear: both; display: block; margin: 0; width: auto; overflow: hidden}.subscribe-css-email-field {background: # 333; color: #ccc; margin: 10px 0; padding: 15px 20px; width: 35%; border: 0}.subscribe-css-email-button{background:#ff675c;color:#fff;cursor:pointer;font-weight:700;padding:14px 30px; margin-left: 15px; text-transform: none; font-size: 16px; border: 0; border-radius: 3px; transition: all .6s}.subscribe-css-email-button: hover {background: # ea5a50;}# Subscribe-css p.subscribe-note{margin:16px;text-align:center;color:rgba(255,255,255,.6);font-size:180%;font-weight:400;line-height:normal;}# Subscribe-css-note p.subscribe span {position: relative; overflow: hidden; font-weight: 700; transition: all .5s}# Subscribe-css-note p.subscribe span.itatu {font-weight: 400; font-style: italic; color: RGBA (255,255,255, .6); text-transform: lowercase}# Subscribe-css-note p.subscribe span.itatu: before, # subscribe-css-note p.subscribe span.itatu: after {display: none}# Subscribe-css p.subscribe-span note: before {content: ''; position: absolute; bottom: -2px; left: 0; width: 0; height: 3px; margin: 10px 0 0; background: RGBA (255,255,255 , .1); transition: all .5s}# Subscribe-css: hover span p.subscribe-note: before {width: 100%;}
3. Then, copy the code below and place it where you want to display a grid
<Div id = "subscribe-css'><P class = 'subscribe-note "> <span> SUBSCRIBE </ span><Span class = 'itatu'> TO </ span> OUR NEWSLETTER </ p><Div class = "subscribe-wrapper '><Div class = "subscribe-form '><Form action = 'http: //feedburner.google.com/fb/a/mailverify? Uri = tips4tricx' class = 'subscribe-form "method =" post "onsubmit =" window.open (' http: // feedburner .google.com / fb / a / mailverify? uri = tips4tricx ',' popupwindow ',' scrollbars = yes, width = 550, height = 520 '); return true' target = 'popupwindow'><Input name = 'uri' type = 'hidden' value = 'tips4tricx' /> <input name = 'loc' type = 'hidden' value = 'en_US' /> <input autocomplete = 'off' class = 'subscribe- css-email-field 'name =' email 'placeholder =' Enter your email '/> <input class = "subscribe-css-email-button' title = '' type = 'submit' value = 'submit' /> < / form></ Div></ Div></ Div>
Change tips4tricx with your Feedburner id.
4. After that save the template and see the results.
0 comments:
Post a Comment